Introduction
The following is essential reading if you are using multi-grid and syncing to SIMS.
You will need be a member of the School Administrator AND Timetabler security groups in SIMS / System Manager.
The multi-timetable licence needs to have been applied to your SIMS database, to verify that this license has been applied the menu Tools / Academic Management / Define Timetable Cycle will be visible.
For E10 to effectively sync with SIMS it is necessary that the Tiers in SIMS match the Campus settings in E10.
In this example the school is an all through with 3 Tiers EYFS, Primary and Secondary.
In SIMS the tiers are managed in the pastoral structure. Each Year group is linked to a National Curriculum Year and exists within a Tier.
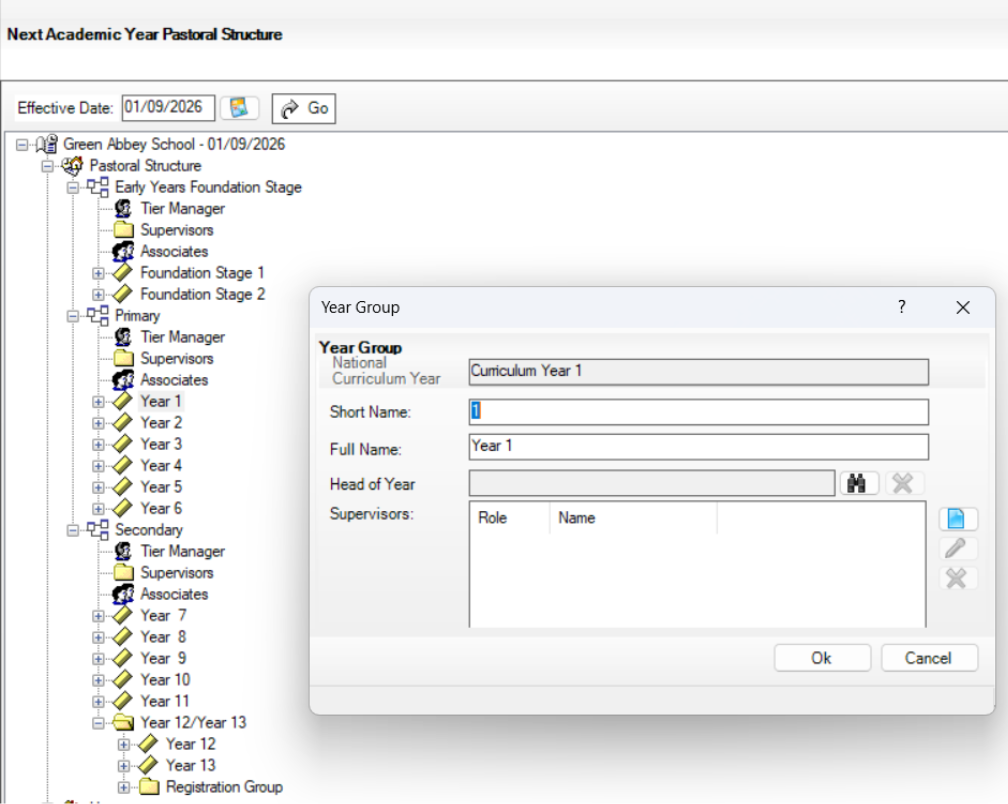
Campus Data
In E10 going to Setup / Campus data the CAMPUS Codes must match the short names of the Tiers in SIMS.
E10 | SIMS |
|
|
| |
|
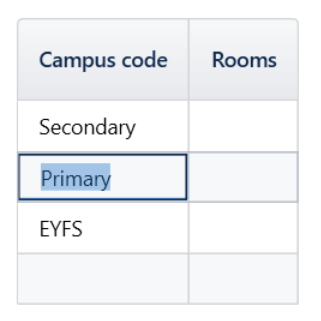
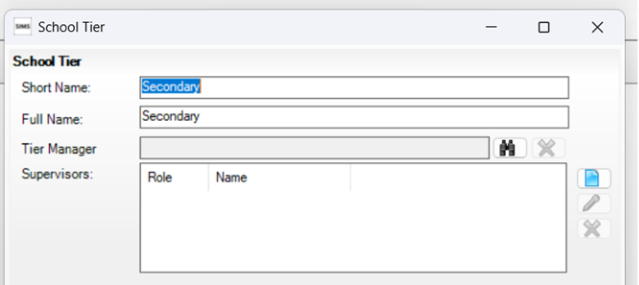
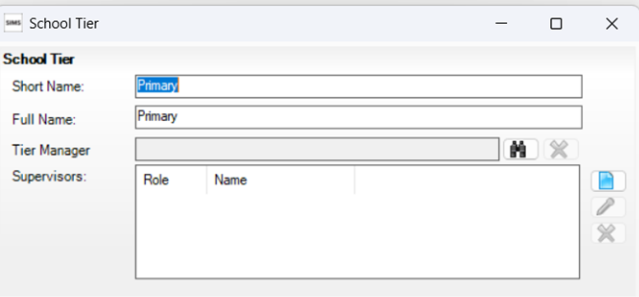
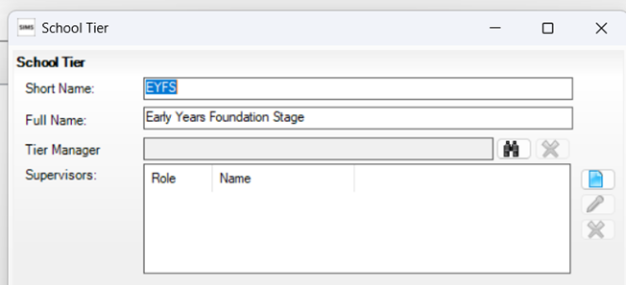
Please refer to the document E10 - ADMIN Setup: Campus data for guidance on how to link the rooms to each campus, and to set the travel time between the sites.
Year Levels
In E10 the Year Levels must match the Arrangement of Year to Tiers in the Pastoral Structure.
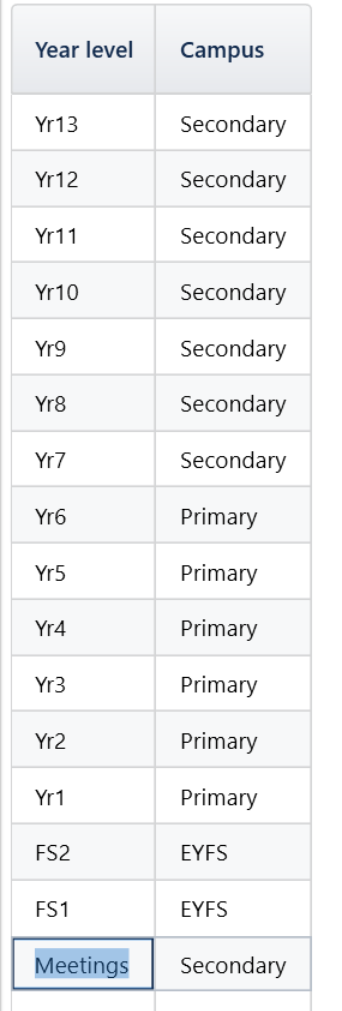
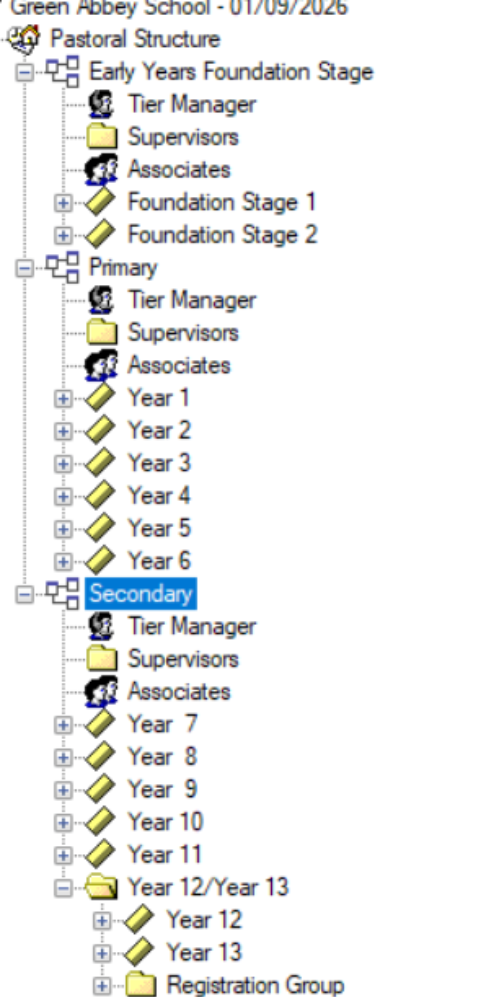
The following documents may be relevant for your setting
SIMS: Setting up Registration Classes
SIMS: Setting up Alternative Curriculum Classes
Grid Structure
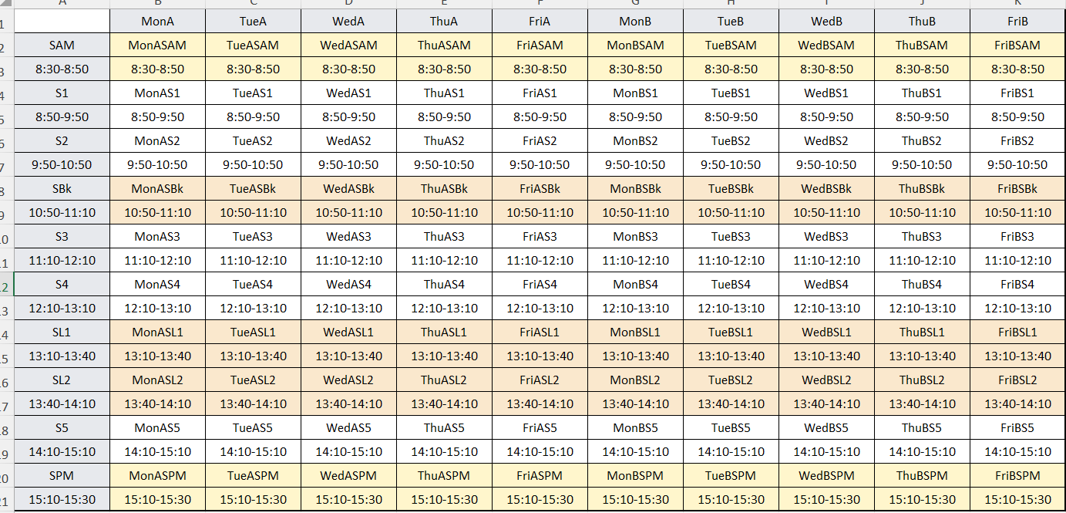
It is important that the Grid structures in E10 for each campus match exactly the relevant segment and Tiers of the SIMS timetable cycle.
In E10 the Grids can be selected by the drop down by the filter button
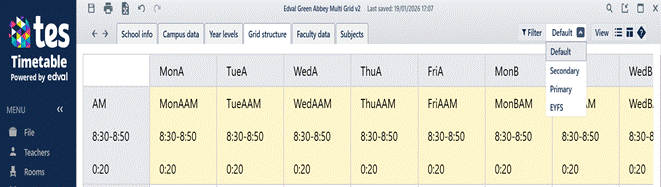
Please note the Default Grid needs have the same bell times as on of the other Grids.
For more information about using the Grid Structure function refer to E10 - ADMIN Setup: Grid Structure
This document refers to the linkage between E10 and SIMS.
In this example the Grids were created when the Campuses were created, the bell times were changed to be what this school required for each campus. The following is the secondary grid with bell times.
In SIMS to replicate this use the menu Tools / Academic Management / Define Timetable Cycle.
The following screen is presented.
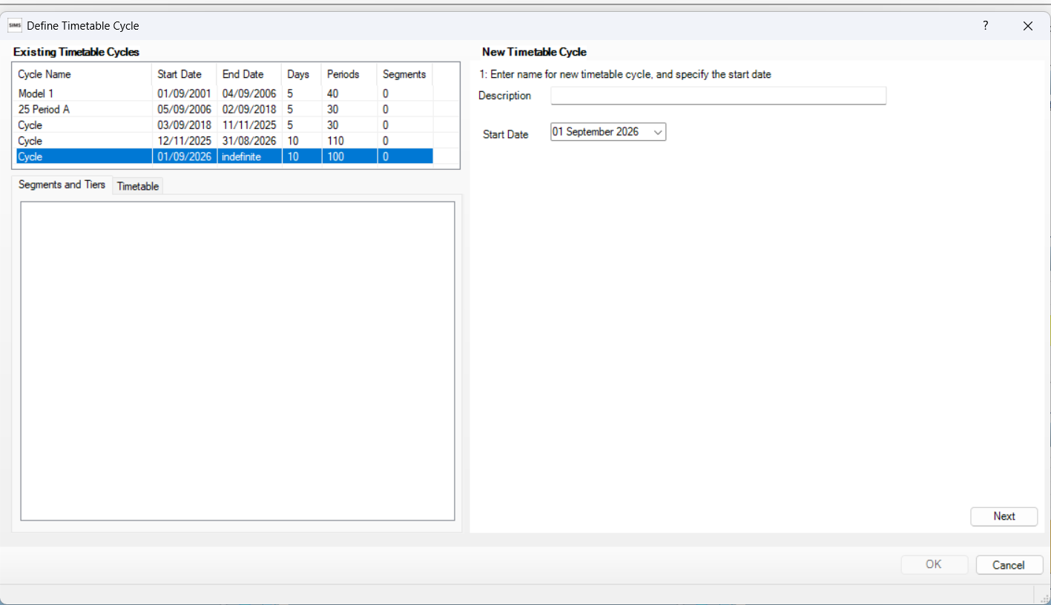
In the Description enter a meaningful name ie: Year 2026-2027, make sure the start date is correct and click Next.
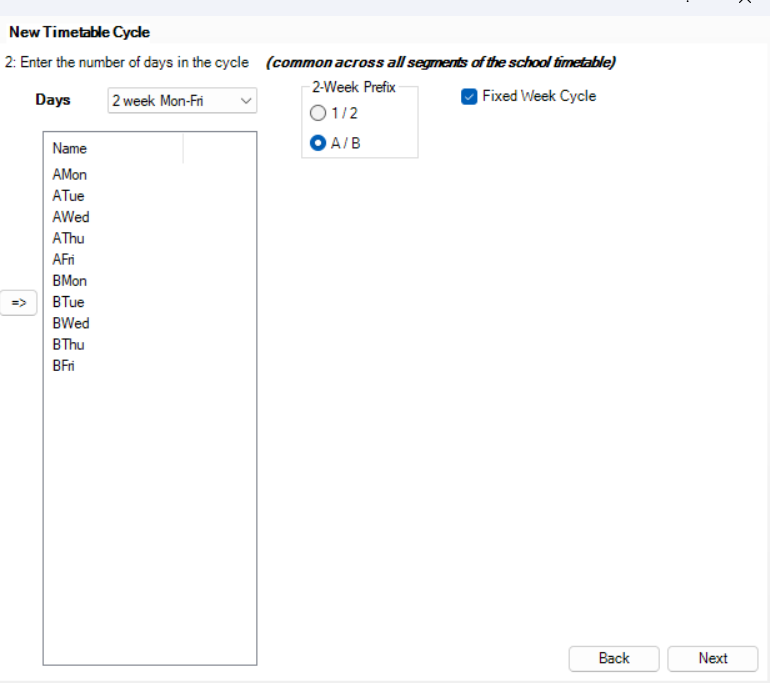 In this case I need a A/B 2-Week Prefix.
Keep it as Fixed Week.
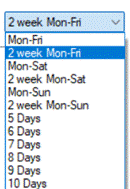
From the drop down for the days structure I selected 2 week-Mon-Fri.
The following is the options available
Click Next
This displays in my system the following screen, the Tiers will obviously be what your school has set up.
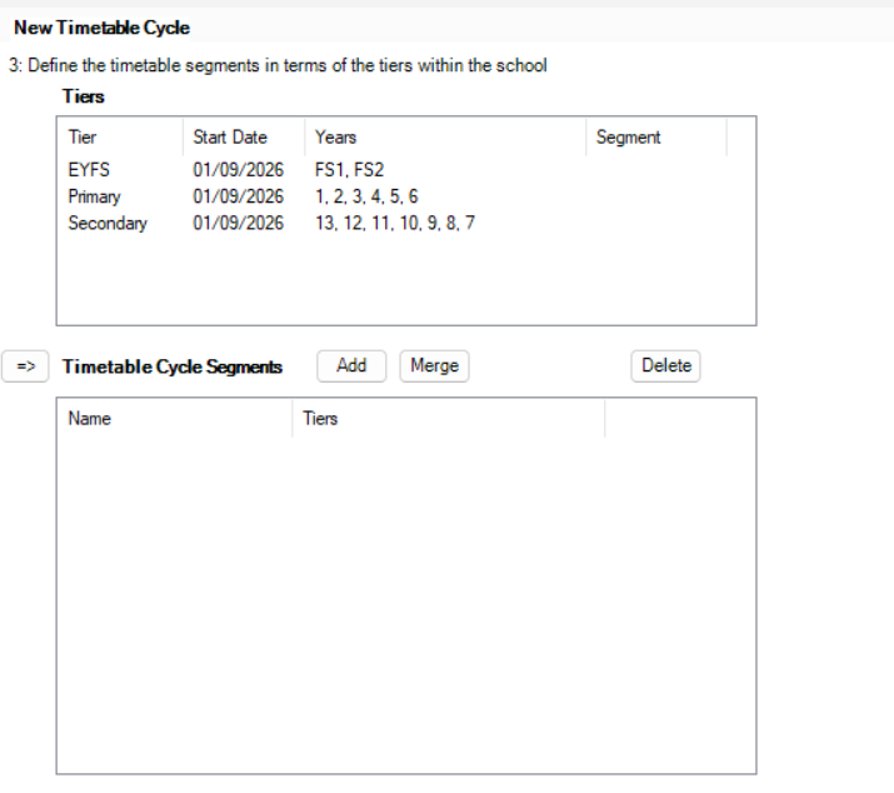
In E10 we use the term Grid Structure, in SIMS it is segment. In this example I need to add segments to the 3 Tiers.
Click on each Tier and click Add
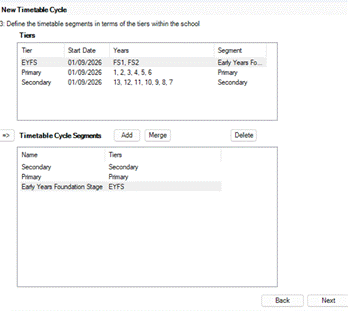
Click Next
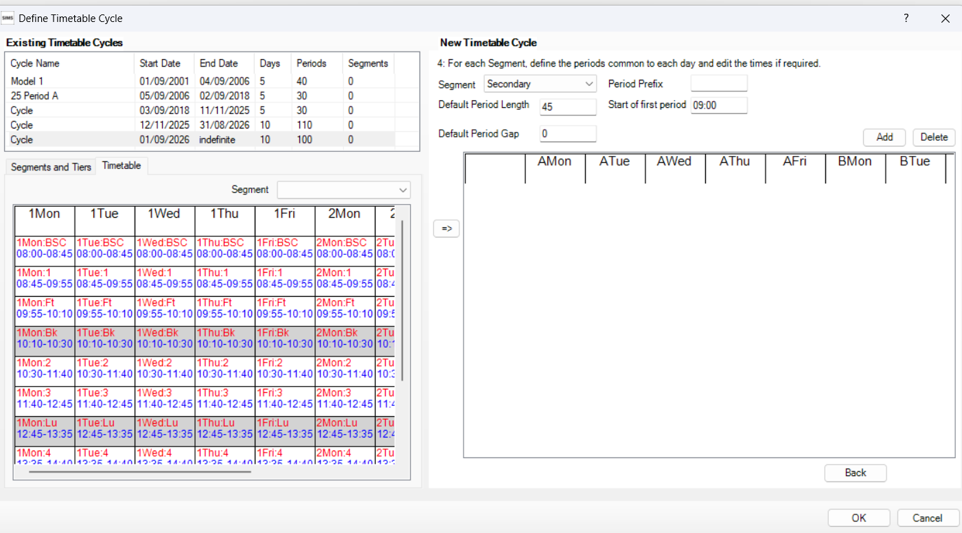
The timetable visible is the existing cycle, we will start building the Secondary Grid.
In this instance the Period Prefix is S, period length 20, start of first period is 08:30.
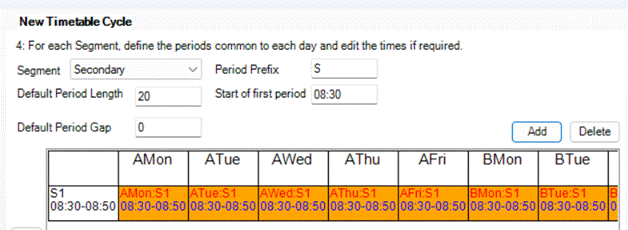
As this first lesson is a registration period, Right click on the first cell S1
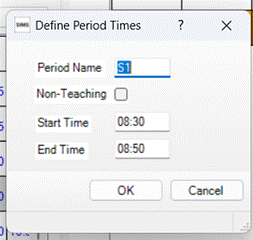
S1 needs to change to SAM and click OK
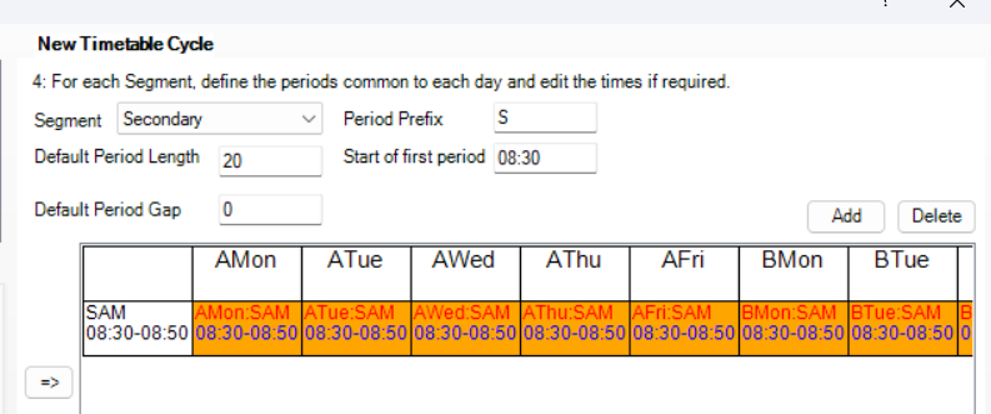
We need to add the other lessons changing the row names as required
Changing the period Length and start time.
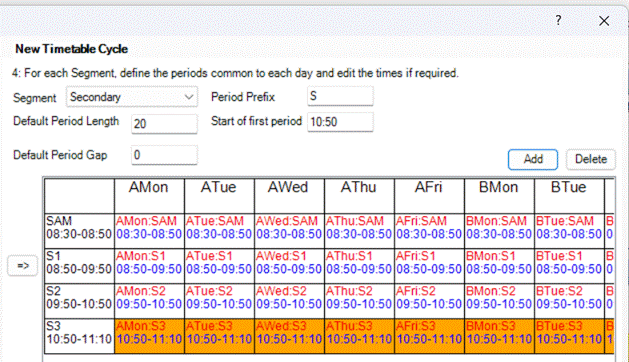
S3 is a break time for the Non-Teaching tick and a name change to SBk.
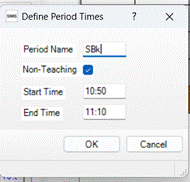
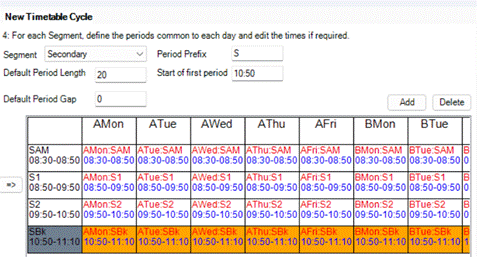
REALLY IMPORTANT
In the E10 Grid any row set as Teaching Period (White), Offline period (Yellow) is treated as a teaching period in SIMS. Any Row set to Recess or Lunch (Orange) or Spacer / unused period (Grey) MUST have the Non-Teaching flag ticked in Define Period Times window.
The segment for Secondary is completed and looks like this.
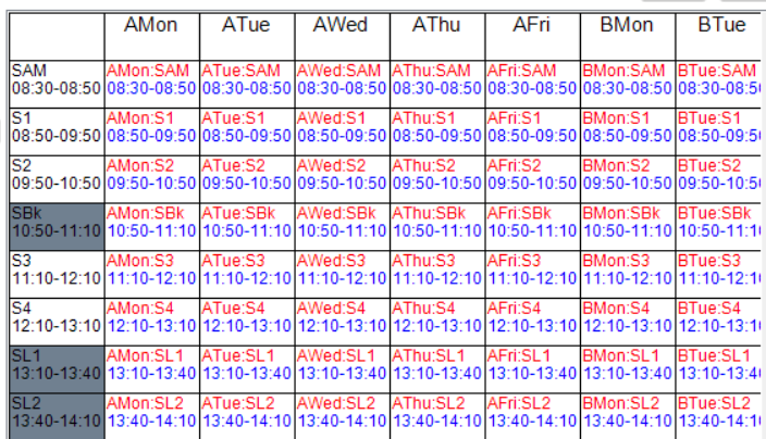
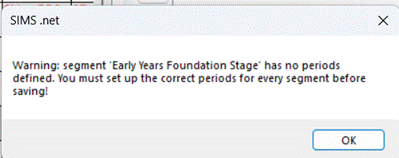
The other Segments need populating before clicking OK.
If you move forward before all the segments are complete you will get a message like this.
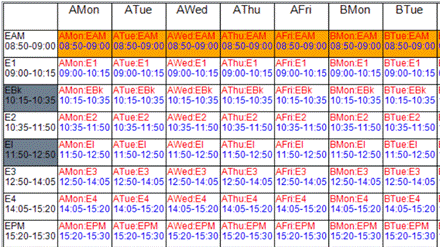
The EYFS Segment looks like this
The Primary Segment looks like this
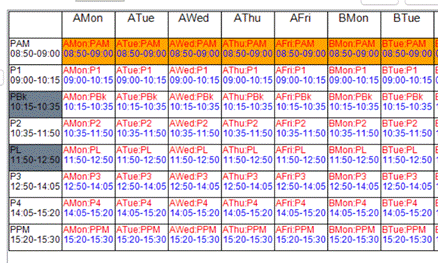
Your Grids will look different BUT it needs to match the Grids in E10
When you click OK the following message will appear.
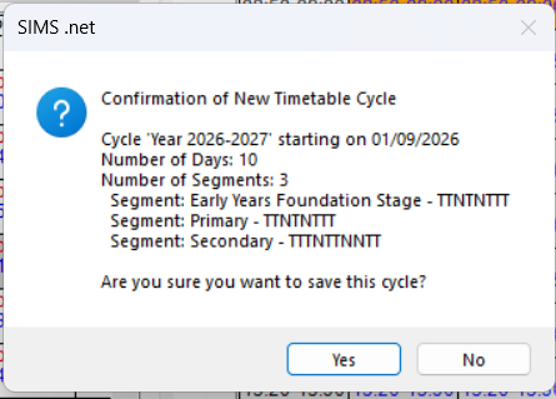
This new cycle can now be applied to the database.
Applying the Timetable in SIMS
Tools / Academic Management / Apply Timetable. You will be prompted to log in with your SIMS username and password. This needs to be done once when a new cycle has been setup.
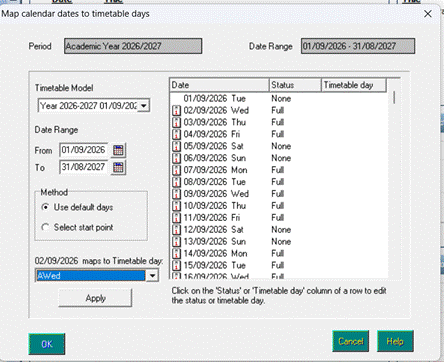
In this example I selected AWed to be the first timetable day of the school year.
Click Apply
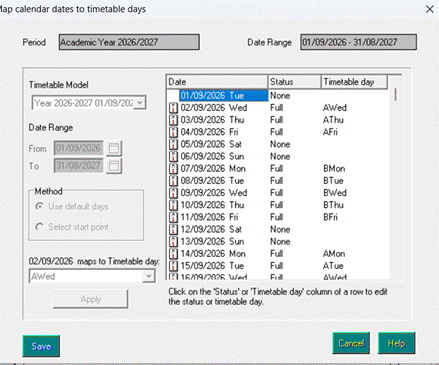
Click the Save button and the timetable will be applied, no other message will appear.
Lesson Monitor Setup
When the cycle has been applied it is necessary to configure Lesson Monitor
Tools / Setups / Lesson Monitor Options / Lesson Monitor Setup
Select the timetable Model for the new cycle by selecting from the drop-down menu
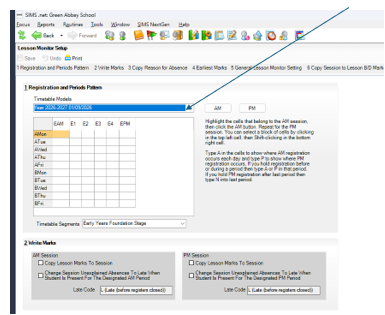
You will need to do this for each Timetable Segment, and it needs to match the relevant GRID in E10
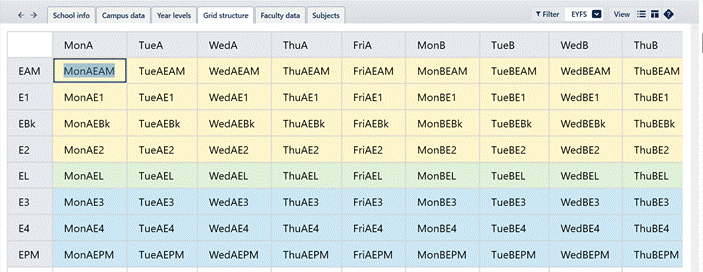
For example: In E10 the EYFS Grid looks like this in my example this is with Half days displayed
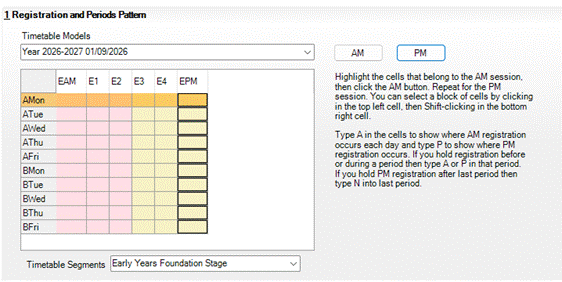
In SIMS click on each Column in turn and click AM or PM resulting in the following in the example
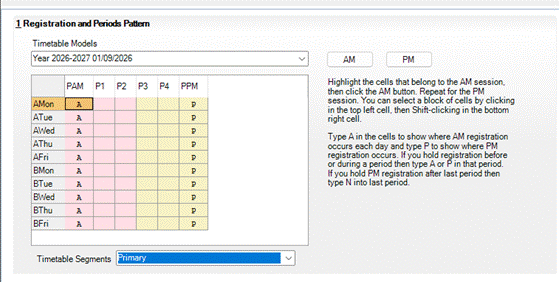
We then need to put the A P or N into the relevant column, refer to the guidance in the window.
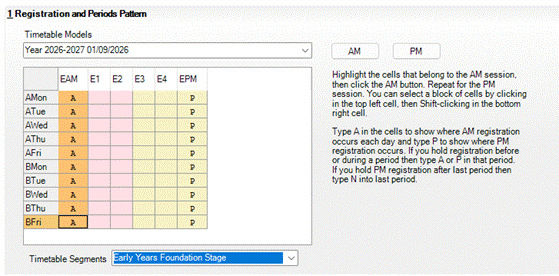
Repeat for each segment (Primary)
And Secondary
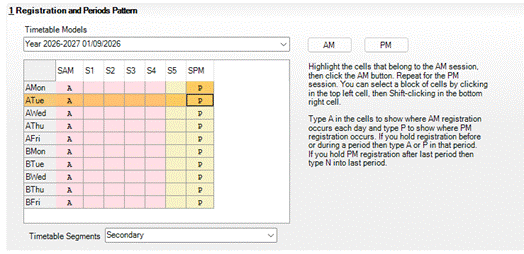
In this case SL1 and SL2 are not visible as they have been set up as non-teaching lessons.
Section 2 Write Marks
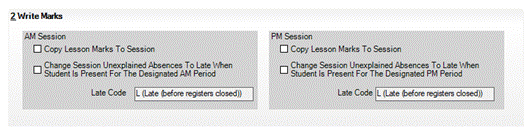
These need to setup to reflect how your school takes its Registers.
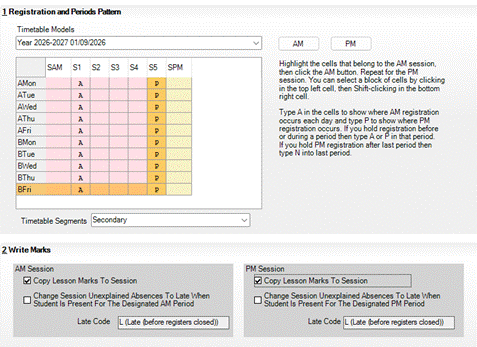
Please note: This applies to ALL grids and years. That is it is a whole school setting, it is not possible to have the 6th form operating differently to the rest of the school.
For example: if the school took the morning registers in period 1 and 5 then the settings would like this.
Section 3 Copy Reason for Absence

We would suggest that this is ticked so that when Admin staff add a medical appointment to a student’s attendance record then the letter M will appear in the matching lesson registers.
Section 4 Earliest Mark
This is only of use to those schools with 6th Forms

For the select students if a student is not required to attend until period 3 due to not having any lessons, this would take the
Marks from period 3 and copy to the Sessions Marks.
Section 5 General Lesson Monitor Setup

By default, this is set to unticked, leave it unticked as E10 will have populated all rooms, unless the school intentionally set it to None
Section 6 Copy Sessions to Lesson B/D Marks

By default, this is ticked DO NOT untick.
Once all the settings have been the click the Save button
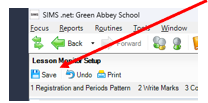
There will be no message is it save OK, but any errors will pop up.
The user can now proceed to publish any new timetables.
Was this article helpful?
That’s Great!
Thank you for your feedback
Sorry! We couldn't be helpful
Thank you for your feedback
Feedback sent
We appreciate your effort and will try to fix the article